Tuesday, March 9, 2021

MG TF work

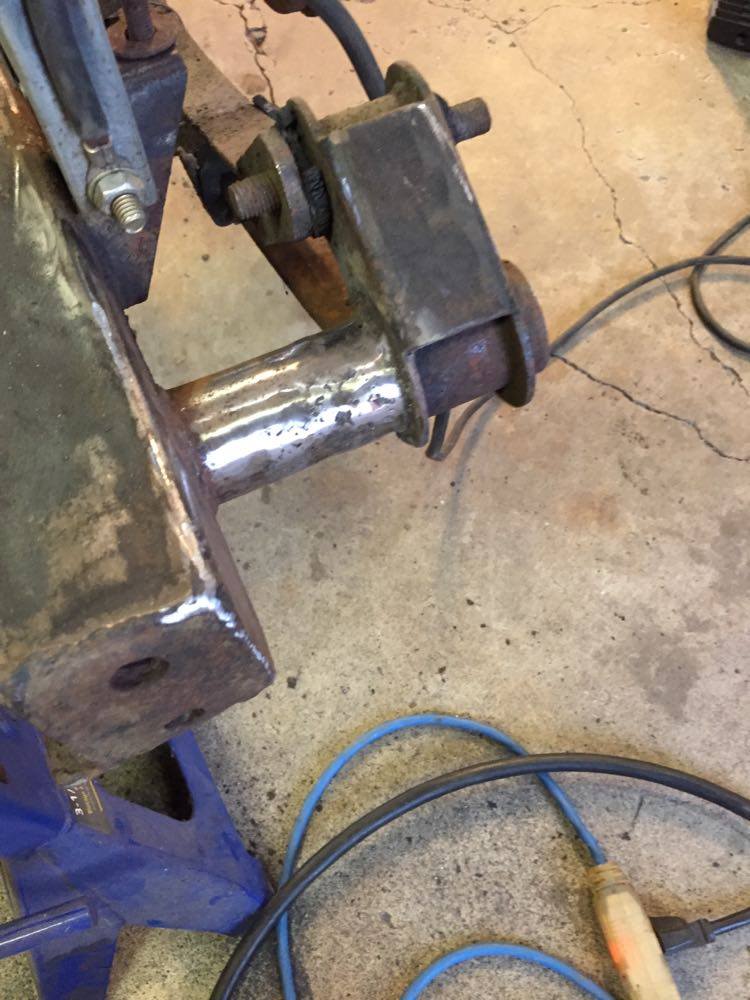
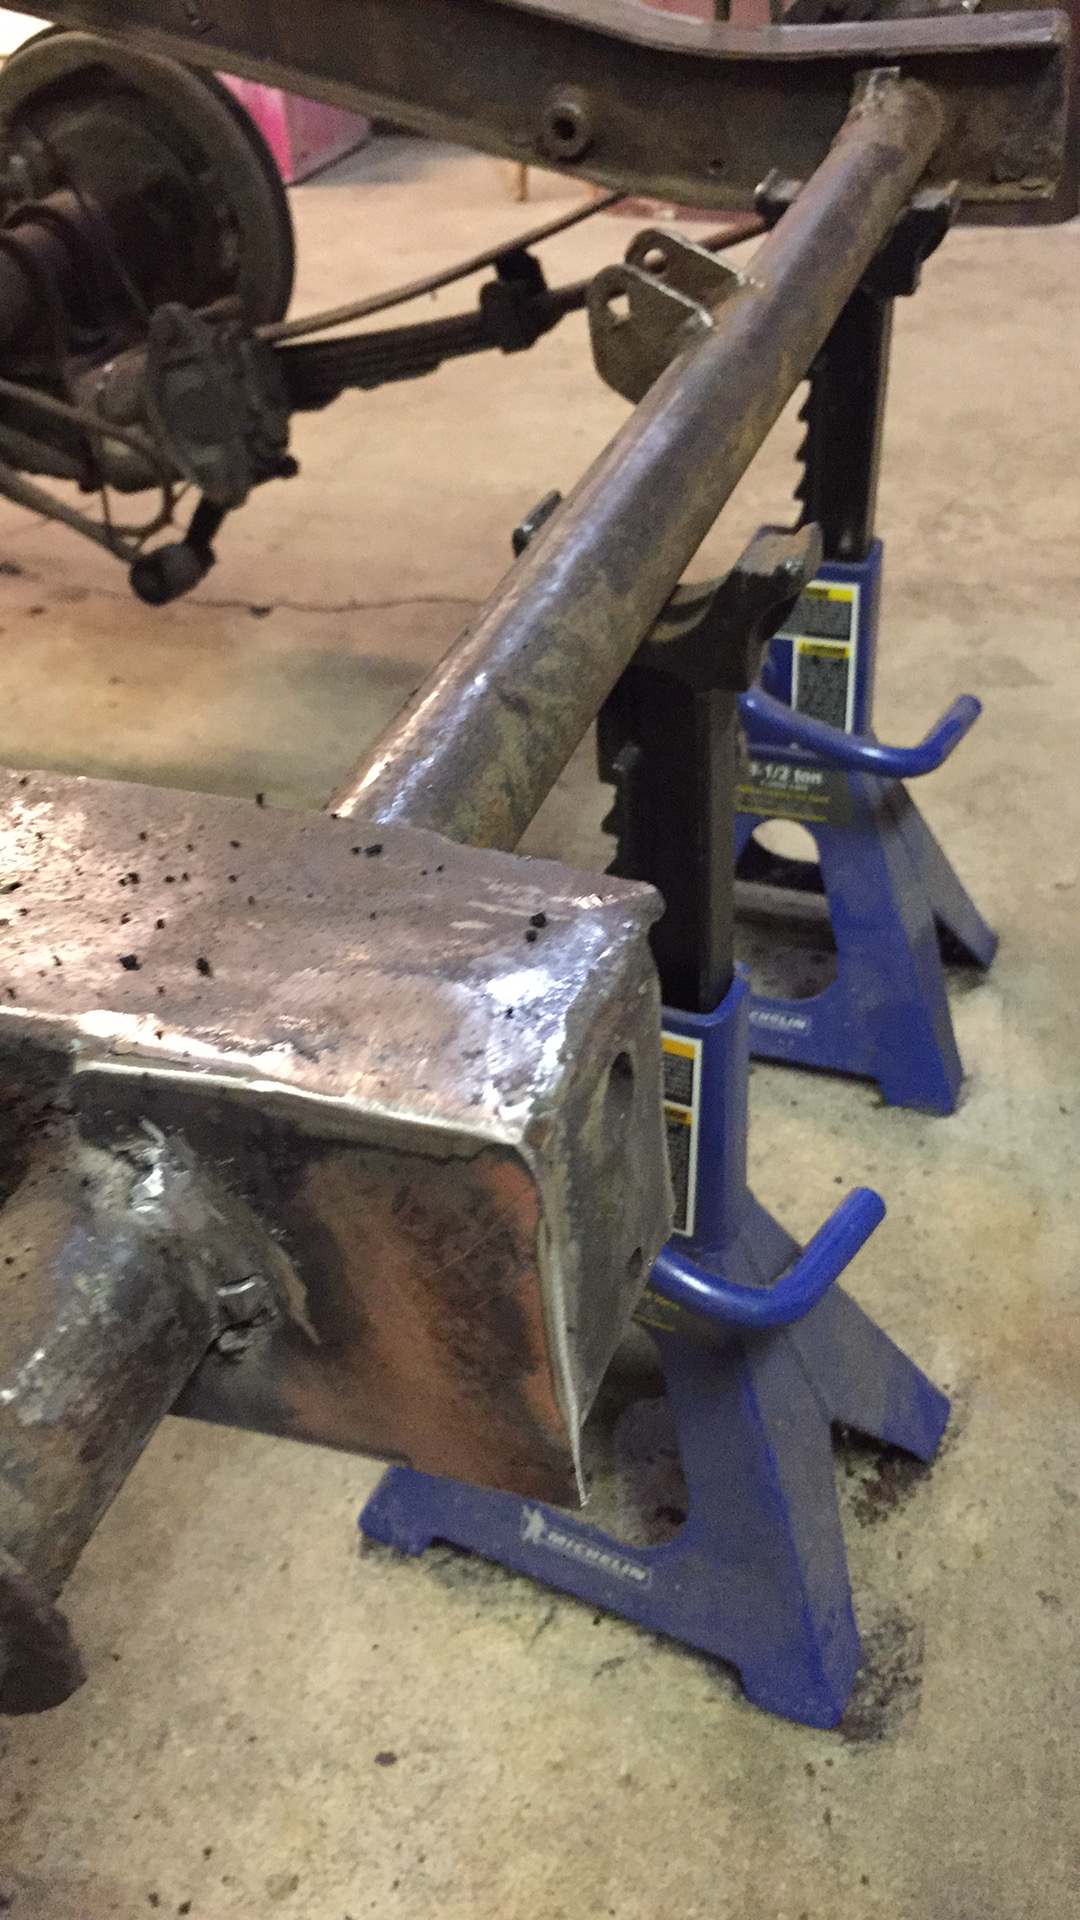
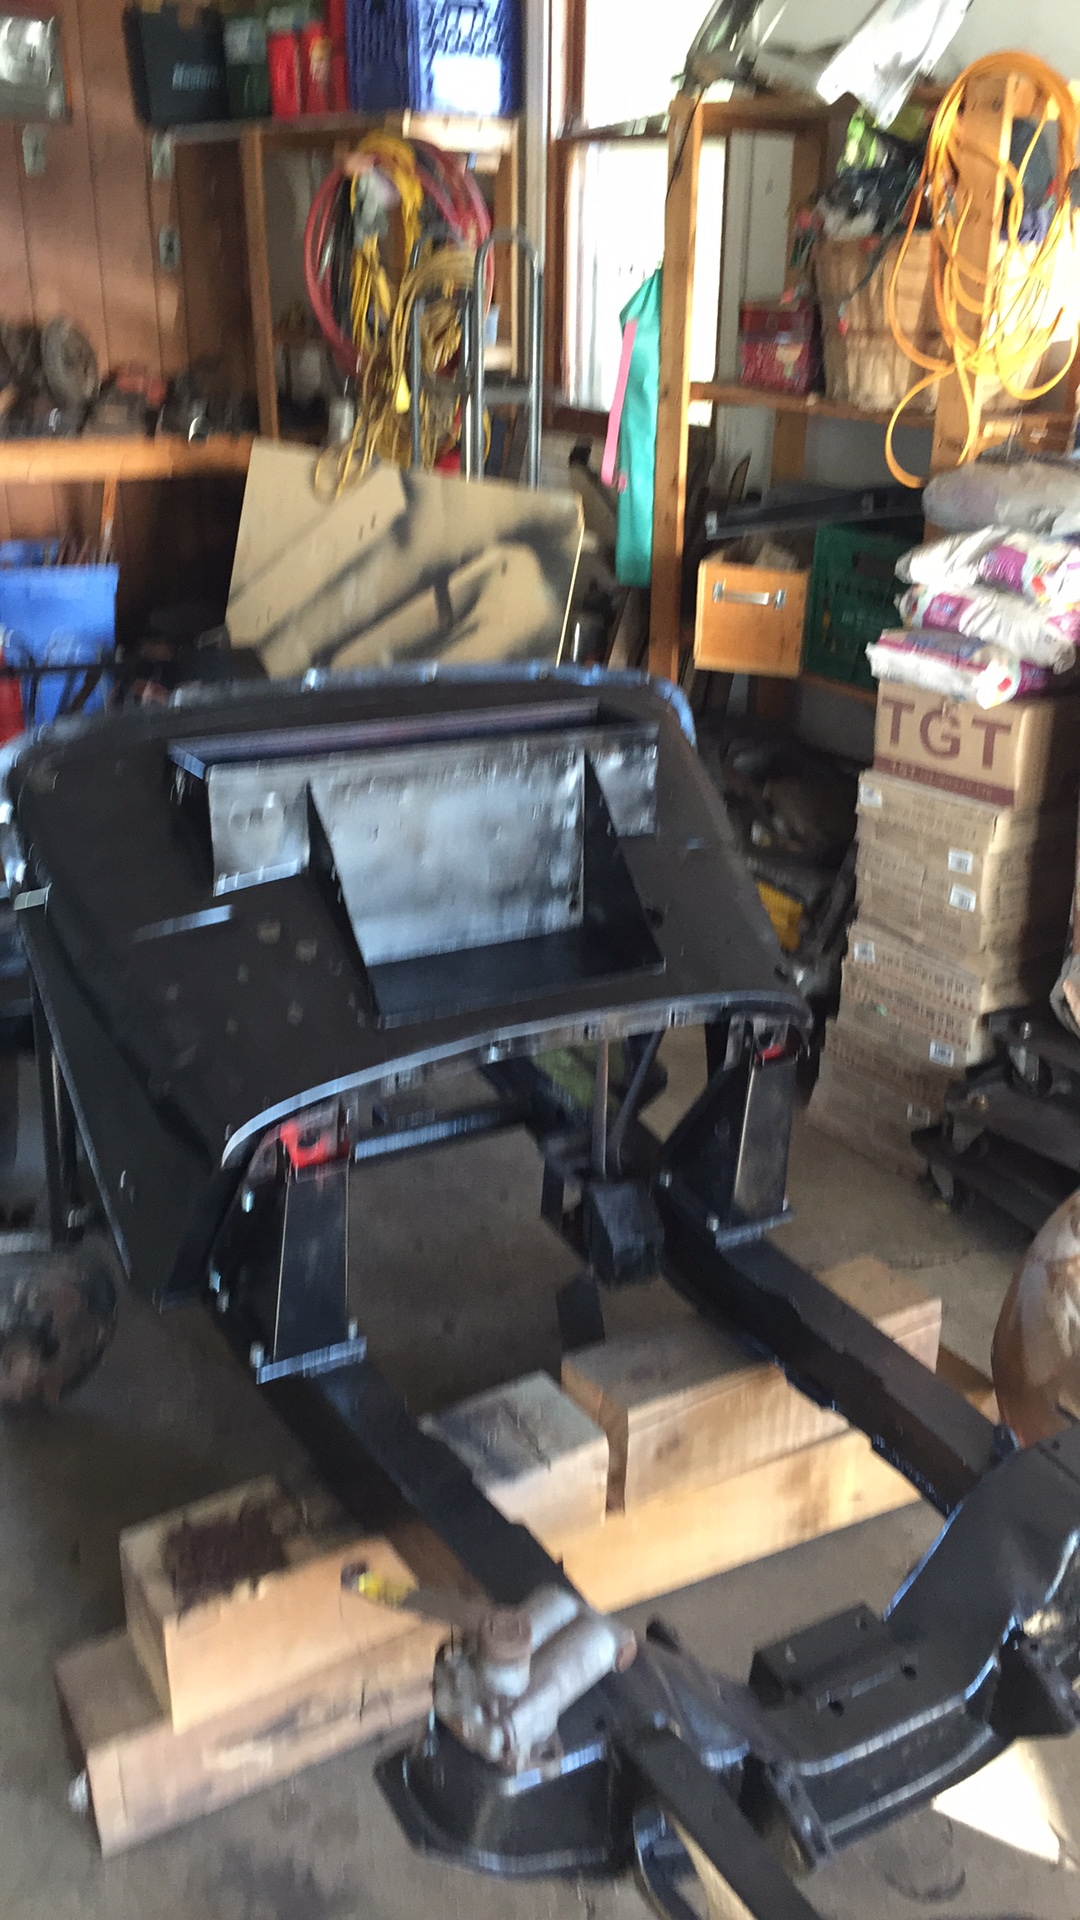
 I will let the photos speak for themselves.  On May 6th, 1954, this once complete car proudly rolled off the assembly line at Abingdon.  She ended up in Canada and was enjoyed for a number of years.  The previous owner bought her in the 1970's.  Somewhere along the line he decided to do a restoration, stripping every nut and bolt and moving some of her vital parts to the basement.  

The owner then became older and his health failed.  In the interim, he had become something of a car farmer and forgot about the TF frame he had left out in a field.

Many years later, his children and grandchildren were tasked with clearing the property.  The grandson was given the TF and a random smattering of other parts as payment for services rendered.  Missing was the gearbox, seats and several other items.  It is likely that many of the components were cherry picked over the years for other projects. 

The grandson had some good intentions for the car, however a cross-country move prevented any progress.  Enter my friend and I.  

I claim very little credit for the incredible work in these photos.  I was performing less important tasks such as cleaning, stripping and priming parts.  This poor frame had most certainly seen much better days;  To my friend's credit, he put a good 30 or so hours into welding, cutting and fabricating new steel to go in.  Most impressive was the replacement of the rotted section below the transmission cross member.  When we picked the car up,  my hand went right through the bottom!   I happened to have some steel pipe of the correct diameter.  One would be hard pressed to look at it now and realize anything had been replaced.  I am blessed to have such good friends.


Until Next time! 


Wednesday, February 24, 2021

Where did he go? (updates!)

It has been quite a while since I have posted! 

Needless to say, there have been some changes.  I started a new job in September, which took me away from things for a while.   I sold off all the Matchless gear along with the '66 Triumph TR6 project.   As of this writing, I have Katie, the 1970 Norton Commando (which I have lugged from home to home for the better part of 17 years) and the BSA.  Oh and an MG.  Did I mention the MG?

Before I jump to that,  I had (as most of us did) a considerable amount of time to think and reflect on the world and myself in 2020.  That time in seclusion was tantamount to a meditative state at times;  I had vacation that I couldn't use for anything of value, short of playing about in the garage.  I had some small victories, for instance getting the free Mini Bike running.  Each day, I meandered about, inventing jobs to achieve each day.  

One of the ventures I had considered was launching a YouTube channel.  I did film some content and realized very quickly how much work was involved.  I will release content later this year once edited, but it will not become a part time job.  Much like this blog, I will contribute when the spirit guides me to do so.  


You may remember a while back when a friend and I bought a pair of Matchless singles;  Said friend and I made a game of going on Facebook marketplace or Kijiji and sending each other ads for projects.  Anything from cars to boats to motorcycles.  One such ad bore fruit for him in the form of a rather solid Porsche 924.  Hopefully he will be able to dig into it later this year.  

One afternoon, I spotted a fresh ad for an 'MG TD/TF and parts'.  Intrigued, I contacted the seller and my friend and I went out to look.  As it turns out, it was a TF with some TD parts. In a million parts.  I wanted to run, however my confident friend felt it was a deal and a straightforward project.  The price was right and we agreed to split costs down the middle and decide the car's fate after 90 days.  

When I sold the Beetle, I said I would never get into another car restoration;  I still stand by that.  If my friend wasn't involved, I wouldn't be either.  It is a great joy in life to have friends that compliment one's abilities and make up for the gaps where one may fall short.  

This deep dive into the unknown (T Series MG's) required me to downsize my projects.  You may be asking why the BSA was spared.  I can best sum it up like this;  It takes up the least amount of real estate in the garage and also has the lowest value.  I also like the little single, a great deal.  It may actually be the most charming bike (aside from Katie) that I have ever owned.  I love the utter simplicity and parts are still plentiful and inexpensive, even NOS items.  That being said, I am still waiting on an exhaust pipe (7 months and counting) but I did acquire a new Indian-made gas tank since my last writing.  I plan to have the B31 running by Christmas.  The Norton will remain on the backburner for a while, with new parts being occasionally added to the pile.   


Back to the MG.  I have previously spoken of my history with the marque, yet the T Series cars were never on my radar.  Whenever I saw them for sale (which was not often) they were prohibitively expensive to buy.  I always suspected that parts would be dear as well.  What I hadn't considered, was that much like the B31, these cars are extremely simple, being of pre-war design.  I greatly admire the TF and TD, both aesthetically and mechanically.  Unlike a monocoque car, these beasts don't have horrors hiding under every steel panel.  To boot, there is something wonderful about a car with wooden floors and suicide doors!  


Stay tuned for more photos and details.

Until next time! 


Tuesday, August 18, 2020

Wrong gas tank! Waterslide Decal tutorial....


A word to the wise when buying a used (or new) tank for a BSA B31 rigid;  Make sure you get the measurements under the tank as well as on top.  

I learned the hard way, purchasing a tank advertised as being for a B31, however it turned out to be for a C11.   This is a common mistake apparently, as both are nearly identical from the top and side.  Both tanks feature a speedo mount within with the same badges and knee pads.  Underneath however is a totally different story.  

The tunnel for the the C11 is under 2" (I believe 1 3/4") the B31 should be closer to 3 3/4".  This is to accommodate the taller and larger motor.  

A new tank from India has been ordered, one in bare steel as chrome work from there seems to be a mixed bag.  My intention is to paint anyway and starting with a fresh tank will provide some peace of mind.  With the way the post is moving these days, it will likely arrive by Halloween.  I just hope that the specs on the sheet match what is actually delivered.

I decided to have some fun with the 'wrong' tank by painting it and making my own waterslide decals.  

Inkjet waterslide decal sheets are available on Ebay and other online sources for very little money.  I go online to find images I like and put them in MS paint for editing (This is as sophisticated as it gets for me!).


I usually print off a test sheet in black and white first in order to not waste ink.   The last time I attempted this it was a mess, as I didn't realize I was missing a crucial step.  


These are my sample sheets, along with a clear acrylic sealer.  Without this step, your decals will disintegrate! 

Here are the steps I followed.

1. Select and edit images

2.  Run B&W test sheet on plain paper

3. If satisfied, print sheet in full colour on glossy side of decal paper.

4. Carefully put the sheet aside to dry for 20 minutes- This is crucial as the ink can run and will smear 

if touched.  I always make sure to handle from the corner of the sheet. 

5. Once dry spray a light (or two very light coatings) of sealer.  I used Mod Podge which is widely available from most craft shops.

6. Let  the sheets dry for half an hour.

7. Cut out your decal and soak in water for thirty seconds or so, it will now slide off onto your chosen object.

One thing I will mention, is to bear in mind that these are transparent decals. If you want them to look the same as they do on the sheet, you will need to ensure the paint underneath matches. 


I cut a couple circles out and sprayed them white before sliding the decal on.  


I apologize for the final photo which is lacking in clarity, however it should give you an idea of results.  When the real tank arrives I can do a cleaner job and spend a bit more time and care on paint.  


Until Next time...


Friday, August 14, 2020

Rolling!

What better way to start a weekend than with some good news?  

The BSA is now rolling! 

I will let the pictures speak for themselves, though I will add a couple of notes. 

The headlight bracket was made from scrap laying in the garage.  I then gave it a quick coat of paint and mounted it.  The pillion pad is something I bought off of Ebay in 2007 and never used.  Another shelf piece that was collecting dust!  The bars are a $5.00 swap meet item.  The rigid B31 did not have fork gaiters (boots) originally.  It would have been equipped with long shrouds equipped with fork ears.  I did not have the budget or inclination to source them.  Instead, I found a set of fork brackets with no ears for $4.00 on Ebay.  Some filler, some paint and a trim to square off the bottom and it fitted perfectly.  A pair of cut down Matchless fork covers sit between the bottom yoke and the springs.  These allow the boots something to sit on. Headlight is another Ebay item, purchased for $7.00.  I bought this to get the 5 3/4 Lucas lens, however I ended up using the whole thing.  It is made by Griffin and was originally used on the mustang mini bikes of the 50's and 60's.  

 Finally,  the seat springs for the seat are from fortnine and are intended for a Harley Davidson. They look good and were only $17.00.  


Things are moving! 

Until next time.....

Thursday, August 13, 2020

Lockdown build Progress...

A quick update!  


With the front end sorted out, I was able get a few other things started.  

I swapped out the old Dunlop trials for the Pirelli which looks miles better.


In this shot, the DIY seat pan is also on display.  This was made from an old metal shelf donated by my friend Chris.


I still need to mount lugs, cut foam and make a cover.  I am happy to say that the shape is right and the mock up looks very good! 


Until Next time! 

Tuesday, August 4, 2020

Product Review: Metal rescue


This will be a very quick review, as there are only so many ways you can describe something as being a turd in a sandbox.

I've noticed an alarming trend with any product that offers to strip paint, remove rust or do anything useful.  If the label stresses that it is 'Eco friendly' put it back.

This generally translates to 'Doesn't work worth a damn, but you can feel good wasting your money on it as no whales died'.

I know this sounds like a cynical assessment and somewhat callous.  Do I care about the planet?  Of course I do.  I also care about products that work and truth in advertising.

When you pay hard earned money for a product, the product should deliver what it promises.  It is as simple as that.

I have always used home brew, old fashioned rust removal techniques that are cheap as chips and just as cheerful.  What made me lose my grip on reality and spend an eye watering $35.00 plus tax on this product?   It was two-fold really;  On one hand, I wanted to see if it would work and on the other hand I wanted a gentler approach to cleaning a 70 plus year old gas tank.


French Frank Fritz is a lying bastard.
I cleaned the tank, poured it in and waited a day or so.  The fluid changed colour from clear to that of weak tea, however absolutely no rust was removed.  I then did a second test on some pre-cleaned barbecue grills.  I left it for 2 days,  absolutely no result.  Nothing.

To say that I am disappointed with this is an understatement.  For the amount of money paid, I am quite angry to get something that performs so pathetically.  We are going to be a one income family for the next two years, so every penny counts.

From now on I will stick with the tried and true methods that have served me so well in the past.

This is a dismal product. Unless you enjoy wasting your money and time do not buy it.

Until Next time...


Fork tragedy to Fork triumph!


Sometimes the jobs that appear to be most straightforward are the ones with the most complications. 

The Ebay fork sliders were as described and I was very pleased to get them.  An added bonus was that the seller threw in some internal spares which may be of use someday.  I cleaned them up, gave them a quick coat of paint and started to put them together.

The drive side fork went together fairly well, although it had a slight notch when reaching and rebounding from full dampening.

(It should be noted that I am using some mismatched parts here;  Unknown stanchions and bearings, etc.  Any heartache involved would be entirely self prescribed!)

The timing side was an entirely different situation;  The stanchion only slid about 2" from the top.
I tried the other stanchion, which did a little better at 3.5" 

I did not take too many photos as I was deeply embroiled in solving the issue at hand.  I will do my best to describe my work in case it can help someone else with the same problem.

I started by stripping the stanchion and placing it in the slider all the way.  I then took some painters tape and wrapped it around the stanchion at the top of the slider.  I now had a measurement to work from.

I was a little stumped as to how I would fix the inner part of the slider.

Sand it?  Wire wheel attachment on a drill?  Grinding paste?

I was then hit with some inspiration.   I began searching online for a brake cylinder hone small enough to fit to fit the bore.

Luckily, Princess Auto had just the thing in stock for $11.99.


I started honing, with occasional addition of mineral oil to act as a cutting fluid.  I would then insert the rebuilt stanchion and check my progress against the taped line.  It was clear that I wasn't getting deep enough into the bore to do the job properly.

I fished around in my drill bit spares to find something to use as an extension;  This was then fitted with some Permatex Steel Weld putty and left to cure.


This worked beautifully as I was able to get the full slider honed out to the right dimension.  I put the piece in the vice horizontally and continued until I finally achieved my goal.  With the 220 grit stones, this was a long process, one that I did over a couple days in intervals.  I would not recommend using a more coarse grit as it may remove too much material.  In that event the unit would be scrap.

The wonderful feeling of working forks turned to despair, when I realized I had (at some point) banged the top of the stanchion, taking it slightly out of round.  The nut would no longer fit!

I started to make phone calls, to see if anyone of my contacts had a spare leg for me.  No such luck.

I posted on the CVMG Facebook group and was contacted by a local machinist name Larry who offered to have a look at it.  I did not need to be asked twice!

The next day I went over and he worked his magic on the lathe, re-cutting the thread and testing with the nut.  We chatted about bikes and I admired his Commando built from parts with many handmade stainless steel pieces.  He refused to take any money for the work and invited me to return should I need any more help.  A true gentleman and a tremendous talent!

With the forks sorted, the project is now back on track.

Until next time....