Showing posts with label Welding. Show all posts

Tuesday, March 9, 2021

MG TF work

 I will let the photos speak for themselves.  On May 6th, 1954, this once complete car proudly rolled off the assembly line at Abingdon.  She ended up in Canada and was enjoyed for a number of years.  The previous owner bought her in the 1970's.  Somewhere along the line he decided to do a restoration, stripping every nut and bolt and moving some of her vital parts to the basement.  

The owner then became older and his health failed.  In the interim, he had become something of a car farmer and forgot about the TF frame he had left out in a field.

Many years later, his children and grandchildren were tasked with clearing the property.  The grandson was given the TF and a random smattering of other parts as payment for services rendered.  Missing was the gearbox, seats and several other items.  It is likely that many of the components were cherry picked over the years for other projects. 

The grandson had some good intentions for the car, however a cross-country move prevented any progress.  Enter my friend and I.  

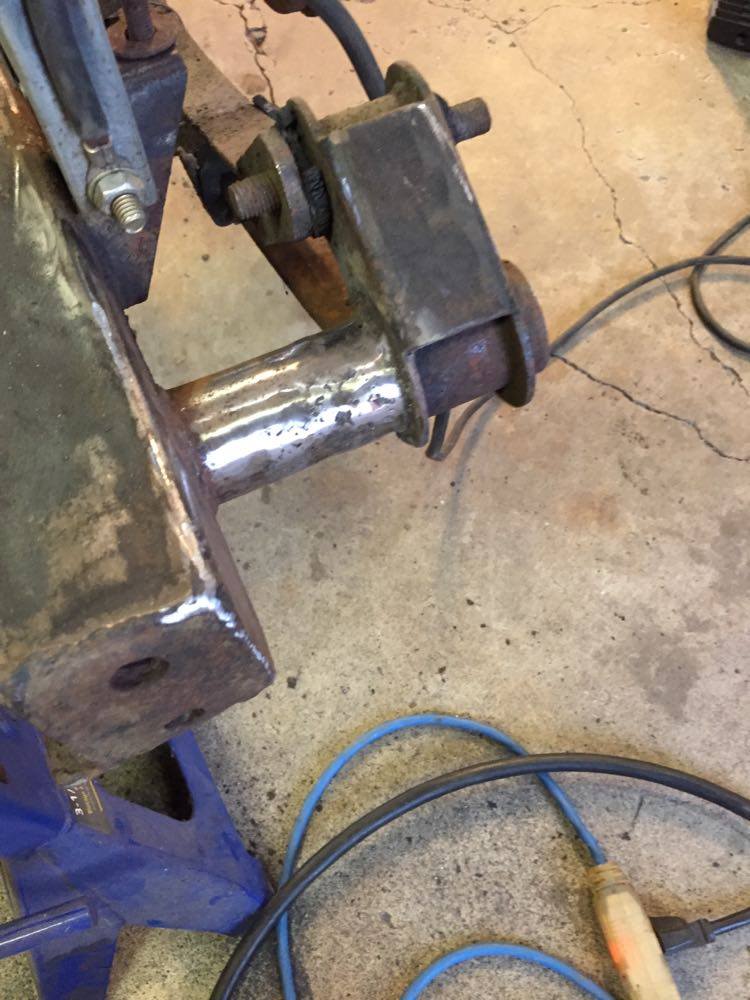
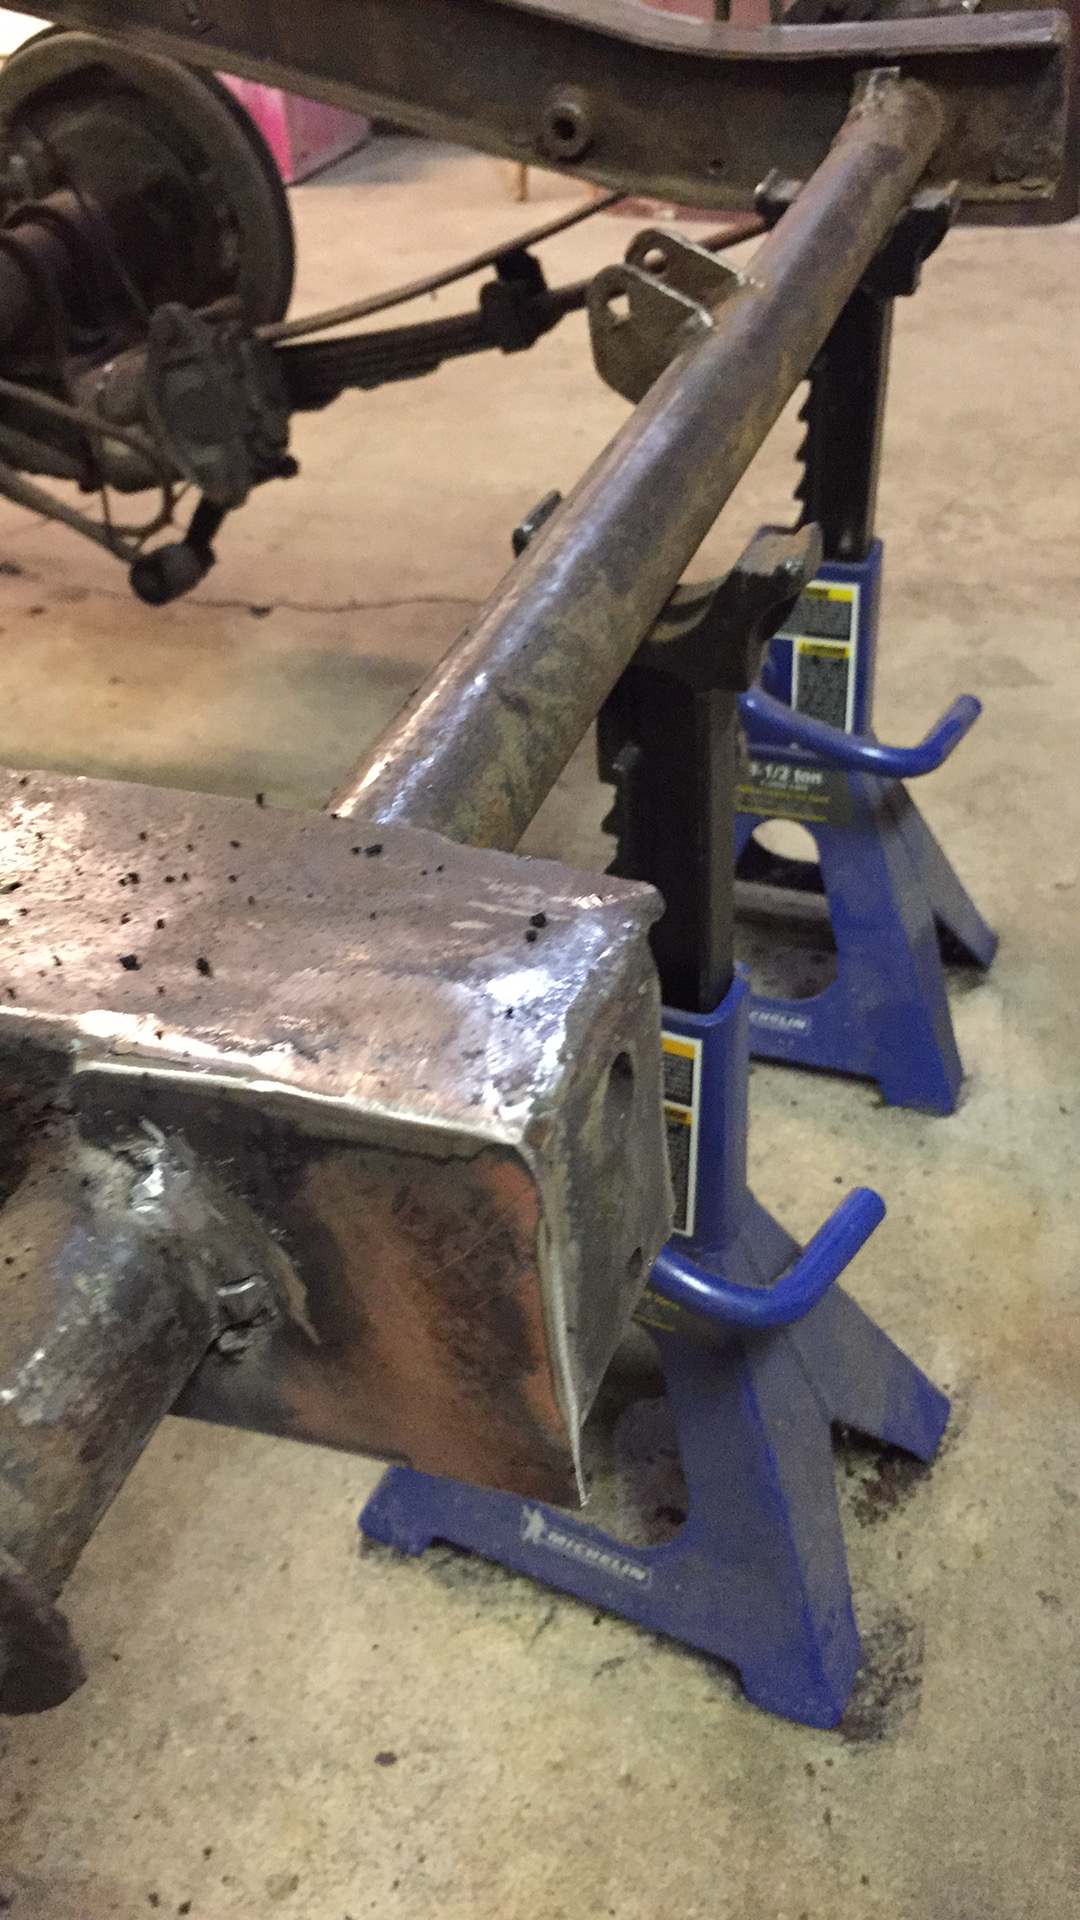
I claim very little credit for the incredible work in these photos.  I was performing less important tasks such as cleaning, stripping and priming parts.  This poor frame had most certainly seen much better days;  To my friend's credit, he put a good 30 or so hours into welding, cutting and fabricating new steel to go in.  Most impressive was the replacement of the rotted section below the transmission cross member.  When we picked the car up,  my hand went right through the bottom!   I happened to have some steel pipe of the correct diameter.  One would be hard pressed to look at it now and realize anything had been replaced.  I am blessed to have such good friends.


Until Next time! 


Thursday, January 23, 2020

Ironing out the niggling details....


In some regards, restoring a bike back to spec is easy.   By easy, I mean having definite guidelines and photographic references to follow.  Hard work?  Absolutely.  Once you have all the right parts however, it can be similar to building a life sized Airfix kit.

Building a custom bike or something from random parts can be much more challenging; Often the smallest victories yield the greatest rewards.

My latest victory was in the form of a tail light.  As trivial as it may sound, I could not find the right tail light/brake light for this build.  This had actually been driving me to distraction for the better part of two years.

I played around with a variety of different styles, finally settling on an original English made Sparto piece that I fabricated a lens for.

Close, but not quite.
It looked good and was very, very close to being right.  It just wan't right enough.

Back to the drawing board.

My criteria was fairly straightforward.  I wanted something that looked period, flowed with the bike and was functional.  I also wanted something unique and lighter than the Sparto unit.   To make life harder, I didn't want a repop item from China or India.  There is a cheapness to these items that always seems to let the side down.

Cruising around on Ebay, I spotted something a little bit different.  It was an NOS Lucas light I had never seen before, a model VT31.  There wasn't much online about it, just that it was used on bicycles and mopeds primarily.  The asking price was low, so I took a chance.

Rather than fabricate a backing plate, I decided to modify something I already had.
The plate is most certainly a DIY item, I have no idea what the off-set drilled holes were for.


The first step was to weld some plate on the back to cover the holes.  I then welded some steel washers into the holes and removed the plate on the back.  Next, I lined up the light in order to drill the mounting holes.


Then a little filler and a bit of paint.

Front 
Side view
I am really happy with the way that this turned out.  It certainly checks all the boxes for me with the added bonus of having lots of character.  Although hard to see in the photos, the light is actually adjustable so I can fine tune when the rear mudguard is in place.

Until next time....


Wednesday, January 8, 2020

Battery Box/Tool Tray build


I confess that I didn't get a lot done over the Christmas break, however I did manage to accomplish several small jobs.

One of these items was the construction of a battery box for the G9 project.  The 1955 frame is a unique one in a few different regards, one being the off-set side mounted battery placement.

Rather than look for an original, I decided to make my own with some scrap lying around.  The box is a little oversize in order to accommodate (small) tools and mountings for my exhaust (more on that next post).  This will also give me more leeway when I eventually buy another battery.

It is always a pleasure to make my own parts, no matter how primitive they may be.  This is the freedom that comes with building a (mild) custom bike rather than a concours restoration.

I wasn't able to take pictures during the welding/cutting/grinding phase, but you get the idea.

The box has since been coated in black chassis paint, the strap came from a discarded Bell & Howell Filmo camera.


Until next time.......

Wednesday, August 7, 2019

It's starting to look like a bike......Finally!


It's been a while since I have updated the blog, however I have been very busy behind the scenes!

The biggest development happened this past weekend when I assembled the front end and frame of the Matchless project.  For the first time, it looks like a proper motorcycle.  As each piece gets bolted on, I find myself filled with satisfaction and pride.  I was especially pleased with the way the steering damper came together with existing parts and a cut down spring from the hardware store.  It works very well (on the bench at least) and I look forward to testing it on the road, along with everything else of course.

Without further ado (as Paul and Craig would say) here is how she currently sits.


The seat pan is a recent acquisition, picked up for $20.00 plus shipping from Ebay.  I had built my own as I couldn't find a pre-'55 pan or a used seat anywhere.  I am happy that I did the fabrication, it was a great exercise and the end product fit the frame perfectly.  That being said, it is heavier and as an original is at hand, I will use it.  The later headlight was also bought for very little but required new captive nuts to be welded inside and some paint.

When I assembled the frame, I realized very quickly that I was dealing with a hardware deficit!  Fortunately for me,  Mr. Partridge has most of the required bits and a package is en route.

The engine is on the bench to the left, just on the other side of the headlight.  That should be assembled sometime this month and placed into the rolling frame.

This brings me to a quick note about the wheels.  When I got the bike it came with a full width '55 only rear hub laced to an 18" rim that turned out to be bent.  The front was of the single sided, early variety that I really like the look of.   I sourced an early rear hub and had both early wheels rebuilt with fresh spokes and rims by a local shop.  I attempted to get it done myself, but to no avail.  I am happy that I at least dove in and gave it my best.   Seeing that a professional found these to be a challenge I don't feel too badly!

I have mounted Duro tires to the front and rear as my budget (now tantamount to pocket change) couldn't accommodate the price of new Avon Speedmasters.  Hopefully I can upgrade them in a couple of years.  I have to say, Duro does make a nice looking tire that looks the part on a vintage bike.  I am sure that they are reusing old molds, though I am not sure who from.  I am told that Shinko reuses Yokohama Molds from the early 70's.

In other news, the 1973 Triumph has been sold and is out of the garage.  I bought the bike as a project in 2007, shortly after my sister passed away.  I never 'bonded' with the bike and I would work on it periodically over the years and spent quite a bit of money on the way.  A loss for me but a gain for the new owner who is retired and has lots of time on his hands.  I am very happy it found a new home where it will be appreciated.  As much as I love Triumphs, the OIF bikes just don't do it for me.

Last but not least,  I decided to treat Katie to a fresh chain and sprockets.  I could have held out, as the stock sprockets still looked good, but the chain had seen better days.  I had been taught that it was false economy to not change sprockets with new chain, so I bought a kit from Volar.

I was disappointed that the master link was of the rivet variety, not a clip as I am accustomed to.  My attempt to put on said rivet master link was a failure and my chain gently rolled off the bike two miles from home!   I  ordered two (one for back up) links with the clip, size 525 in order to remedy the issue.  To my surprise, I discovered that Volar pins are thinner than the standard size by .005 mm.  I called the company and placed an order for the correct parts which I expect to have tomorrow.  The young lady I spoke to was very friendly and helpful and shipped for free (to my US address) very quickly.  Hopefully I will be able to ride by Friday.


Until next time.....


Monday, April 16, 2018

Tank repairs...


Sometime last summer I picked up a couple of bargain Matchless/AJS tanks from a vendor in California to experiment with.  Both had traces of original paint and chrome, the latter of which was the subject of said experimentation.  I had dropped both in wood bleach, which cleared away a considerable amount of rust from the chrome surface however the pitting was too extreme.

I can't seem to find the photos from that specific test, however I will post them when they turn up.

I shelved the one tank for later as it had a poor repair to the bottom.  The second one was a much better prospect, having few dents and a lone screw broken off in the thread for one of the badges.   I decided that removing it wasn't a big problem and I needed the practice to perform the same operation to a 1966 Triumph tank waiting in the wings.

Unfortunately I was mistaken.  While I started off with a small drill bit, I somehow ended up punching a hole right through!

With no welder at the time, it joined the other tank on the shelf.

As the ice storm was hitting hard outside,  I needed to feel some sense of achievement inside the garage.

I fired up the old Becca Mig and began to build up some material around the hole.  This was then ground down flat.  I became ambitious and began to lead fill the tank.  This probably would have worked out better in warmer temperatures as you fight the ambient temperature to keep the metal hot enough.  I will need to add a bit more lead to finish, but overall I am pleased with the results!

With an all metal tank, this opens up to another planned experiment I am saving for the summer.

A true bugger up.

Some build up of material 


After some grinding 

Some lead filled in


After the smoothing out


Until next time! 

Monday, November 6, 2017

Welding updates...

As per my last post, I started a 6 week welding course at the local college.  I was four weeks in when the college staff went on strike.  For now at least, things are on Hiatus.

We spent quite a bit of time on SMAW (stick welding) which was highly educational;  The biggest lesson being that it is much easier to strike an arc with an auto-darkening helmet!  I was fortunate that we moved on to MIG on the last day, with a good three hours of lab time.  

With my Saturdays free I decided to have a look for my own machine.  As usual I turned to Kijiji in the hopes of finding something locally.  I cannot for the life of me understand advertising an item for sale and then ignoring potential buyers.  This is what I ran into on six different occasions until I found something within an hour from home. 

For the bargain price of $80.00 I turned up this little Italian made gem built in 1985.  


It's a little beaten up, but everything fires up nicely and it has its own stand (on wheels).  That being said, the gun is a little damaged and the tip was missing.  I discovered that it takes a 6mm Euro-type 15 which is available on Ebay and other online sources.  I bought a 5 pack from Scotland which came to about $7.00 including shipping!  

If you Google BeccaMig 140 virtually nothing will come up. I did email TelWin, the company who built it and was politely told that due to the age, they have no data to share.  I was hoping they might have had an archived manual somewhere. 

Without any Argon gas there isn't much I can really do, however I was able to test with the new tip and everything is a go! 


Until next time....

Thursday, August 31, 2017

Back to School!

We are never too old to learn and never too old to deal with what has been put off.

I have decided to tackle both by signing up for a welding course at the local community college. 


 My friend did an exceptional job installing my floors and heater channels;  I found myself envious at times as he made it look so easy.  He is entirely self taught, honing his skills over the last 27 years on British cars and other projects.   

I am ashamed to admit that I was intimidated by welding and always avoided it.  Relying on others is fine on occasion, but not something to make a habit of.  

My friend has a young family and a demanding work schedule these days.  In conversation he has told me he feels badly about not getting the Beetle finished;  I always make sure to show appreciation for all the hard work he has already put in.  Without him, the project would have never gotten off the ground. 

It is definitely up to me to take things over the finish line.  

With formal instruction I hope to gain the confidence to do my own work.   The course runs from Mid-September until the end of October, every Saturday morning for four hours. 

I am very excited to take on this new challenge! 


Not me.....yet.  (soon though!)